


Happy late Mother's Day! I hope all of you Mothers out there had a wonderful weekend. My family spoiled me all weekend long :)
I know I have been a bit behind lately so today I will be sharing something BIG.
For the past couple of weeks I have been working on our crown molding and it has taken all of my free time! I still haven't finished it yet but I want to share the process before the finished product.
Forever my Husband has been wanting to install crown molding in our home. The problem is that our main floor is close to 1500sf and is all connected. So the whole main floor would have to be done, that's close to 400 ft of molding! We also have tons of weird angles and corners that we decided it was out of our ability to do it ourselves. So we brought in our friend Morgan, who does finished carpentry for a living, to help us out. He showed up and within 15 minutes he had his saw set up and his first piece in place.

Eric and Morgan spent about 5 hours one day putting it all up...the caulking, sanding, taping and painting is all my job. Lucky me huh?!?

Morgan did most of the work and also taught us a few things.
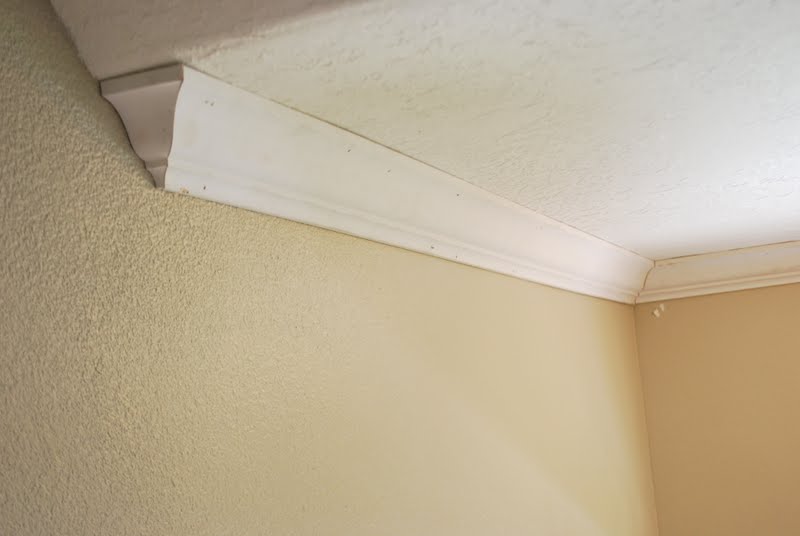
First thing he taught us was all about angles. You need to know the angles of the corners you are working on, most corners are 90°. If your corner is 90° then it means your cuts have to be at a 45° angle. That is what the corners in the above picture are. Now the tricky part was our rounded corners.

To get 90° on this corner we needed each cut to be 22.5°, because 4 cuts at 22.5 equals 90.


Here is how he did the corners: take some wood glue and glue the center piece to your edge piece.

Next he switched nail guns from a standard 18 gauge to a 22 gauge. This gun is the key to getting professional looking corners. Its way smaller and makes tiny hard to see holes.

He uses this gun to nail in the middle pieces of the corners. As you can see from the pics below, he never nails the middle piece into the wall itself. He just glues and nails them to the other pieces.


And there is the basics on putting up crown molding. Now comes the fun part, caulking! It has taken me 3 days of work to caulk all of the molding. The best tip I have for caulking is to use this finishing tool.

This tool will save you life...and your fingers! I used this for the top of the molding but not the bottom. I found that the easiest way to do the bottom was to apply the caulk with a caulking gun and then go over it with a wet rag to remove the excess.
For the nail holes we used this painters putty which was easy to work with and can be applied with a finger.

If you have a large space and you want to add crown molding it seriously would be worth the $ to hire someone. This has been a HUGE project but in the end it will be worth all of the hassle. Hopefully in the next couple of days I will have them painted and ready to post!!

No comments:
Post a Comment