Photobucket Photobucket Photobucket Photobucket Photobucket Photobucket

May 10, 2012

Vecco


Hello everyone! Today I have the opportunity of sharing our latest advertiser...Vecco! This company is so cool. You can purchase a kit to design your own welcome mat and even area rugs. How does it work? Well on their website they explain..."Vecco is a painting technique for creating rugs and carpets inspired by you. With stencils,colorant sprays and sealants, you make custom designs that'll tie any room together."
The kits start at $49.99 and go up from there. Here are a few of my favorites:


 See how cute they are?? Head over to their site now and check them out!!

April 27, 2012

New Mirrors!

The other day I stopped in Hobby Lobby to get some cupcake liners. I ended up walking out with these babies and no cupcake liners...story of my life:)


I found these in the clearance section marked 50% off because they had some scratches on the corners. Nothing a little wood marker cant fix!


I touched them up and hung them up and love them! I have been looking for something to hang in my main floor hallway for a while now but never really knew what I wanted there. I thought about a mirror but thought I would need a huge one to fill up the wall and those can get pricey. Well I saw these and thought they would be perfect.


I now want to add some wainscoting treatment to the walls and some lighting. This is the main hallway in the house and it has no ceiling lights!! 

I really liked these two pictures to show what I want to do to this wall. Ive had them saved on my computer for a while now and can't find the sources...Sorry!


I think it will look really nice when I'm done. 
Now I just need my Husband to pick up the molding ;)

April 15, 2012

Master Bath Potty Room

Wow has it really been a month since I last posted on this blog??? I have taken a break from anything home decor but I have now gotten the motivation back that I needed to get some projects done! Today I want to share a small makeover I did in my master bathroom. Our bathroom has a separate room for the toilet and it needed some major TLC. Since we moved in I hated this room because it was so boring and the walls needed some touch up, so I always would keep the door closed.
 Here are the before pics...


Notice the powder on the floor?  Before we moved in we hired a dry waller to come in and patch up holes in the walls throughout the entire house. This bathroom was no exception to that. I wish you could see just how bad the walls were. I had to sand down part of the wall and paint with a primer before I could do anything else in the room. 

Here is the after...


I started by painting the room the same color as the rest of the bathroom. Post found here, and no we have not progressed on the rest of our master bath plans :(


I took things from around the house to decorate this small space. This room is so small and only big enough for the toilet, so I didn't want to put a lot on the walls in fear it would crowd the space. I put only a few simple touches above the toilet to give it the feel I was looking for. This basket I had on hand and love to fill it with toilet paper. Not only does it look good, it serves a purpose to!


The shelf I had in storage for a long time without a place to put it. I think its perfect for this space.


 The framed art I made and is up for sale in my Etsy shop


The only thing I bought for this space was the little lighthouse which I found at Pier 1.


I love that I have a place to display our shells from our last Cali trip a few weeks ago...


and one more look at the whole thing...


And that does it for this mini redo! 
Hopefully I can get my rear in gear and finish up the rest of our bathroom :)

March 15, 2012

A Super Mario Party

A few weeks ago this sweet little boy turned 5!


For his party we decided on a Mario theme. I had so much fun putting all of the little details together and it turned out great. Here are some pics of the party!

The Dessert Table:


Boo Balloons:

Made out of white balloons and paper cones for the "wings?" and drew the face on with a sharpie. I hung these above the dessert table and down the hallway.


Pin the mustache on Mario and Mario Bingo:

Don't mind the ghetto mask...a detail that I forgot about. 
You can find the free printable for both games here.


The mustaches were found at the dollar store and were so much fun to play with!


The party was a hit and I think all of the kids were happy!


February 23, 2012

DIY Frame Tutorial

 As promised here is the tutorial for the picture frame I made here. As I said before, after I put the large picture on my wall it just didn't look right to me. So I thought that a nice big chunky frame would be the perfect fix. 


I went back to the hardware store and picked out my molding, came home and got right to work. I wanted the frame to sit perfectly around the picture so what I did was hold my molding right up to the picture and measured slightly more than the length of the picture on the molding. You want to make sure the frame is slightly bigger than the picture itself so that it can hang directly on top of the picture...I'm talking only a 1/4" difference. I made a 45 degree cut on the ends of each piece. This method worked perfectly and only took me about 15 min to make all of the cuts. 


Now I assembled the frame. I figured since the frame wasn't going to be holding anything up that it would be light enough to use wood glue. So I just stuck a small amount of wood glue between each corner and held it in place. Wood glue dries fairly quick so I just sat there and held each piece until it was dry enough to move on to the next corner. Once the whole frame was assembled I flipped it over and put a big glob of glue on the back of each corner to make it a bit more durable. I might go back and add some brackets to make it even more secure but for now this works. 


Once the glue was dry I took some brackets I picked up at the hardware store and attached them to the back of the frame. The nails are so small that I had to use pliers to nail them in. I put 2 of these on the back of the frame.


The last step is to caulk the edges and paint which I haven't done yet, I hate that part :) I then used some small nails and hung this frame directly on top of the picture and voila...you are done!


Now I want to add some wainscoting along that wall to finish it. But that is another project for another day :)

Linking up to:
katherines Corner
A Creative Princess
The Crafty Blog Stalker
House of Hepworths
Seven Thirty Three

February 20, 2012

Pinterest Copycat

If you guys are anything like me then you are addicted to pinterest! The minute I sign in I am pinning the most beautiful and amazing things. I then find myself trying out those things as soon as I can. Some of my favorite recipes come from there that I probably make WEEKLY!

I found a few projects recently that I just couldn't resist trying in my home. The first was the DIY ruffle curtain found here. A boy, a girl and a pug gives you a detailed tutorial on how to make these inexpensive curtain. Really these were pretty easy, it just took some time to hem all the pieces and sew them together. But I love how they turned out. Before I had just plain white curtains and sewed the ruffled strips right to the existing curtain.


I love ruffles but was afraid it was a bit too feminine. So I tried to tone down the ruffles and I think it turned out perfect for the look I was going for. 


It adds a lot more character to some boring old curtains. And the best part is it only cost me $10 and I feel like I have totally new curtains:)

Another project I tried was "frosting" my front window. 7th house on the left has a free pattern that you can download to make your own frosted window out of contact paper. The end results are amazing!


This project took some time. I did it while watching an episode of The Bachelor :) Each one of the Moroccan tiles was traced, cut and stuck on separately! I think that my scissor fingers suffer permanent damage from all the cutting, but it was totally worth it! I tried to get a picture of it outside but it was really sunny and a bit hard to see.I'm in love!


 The last project I did was probably my favorite. Sugar bee crafts shows you how to make an inexpensive giant picture. 


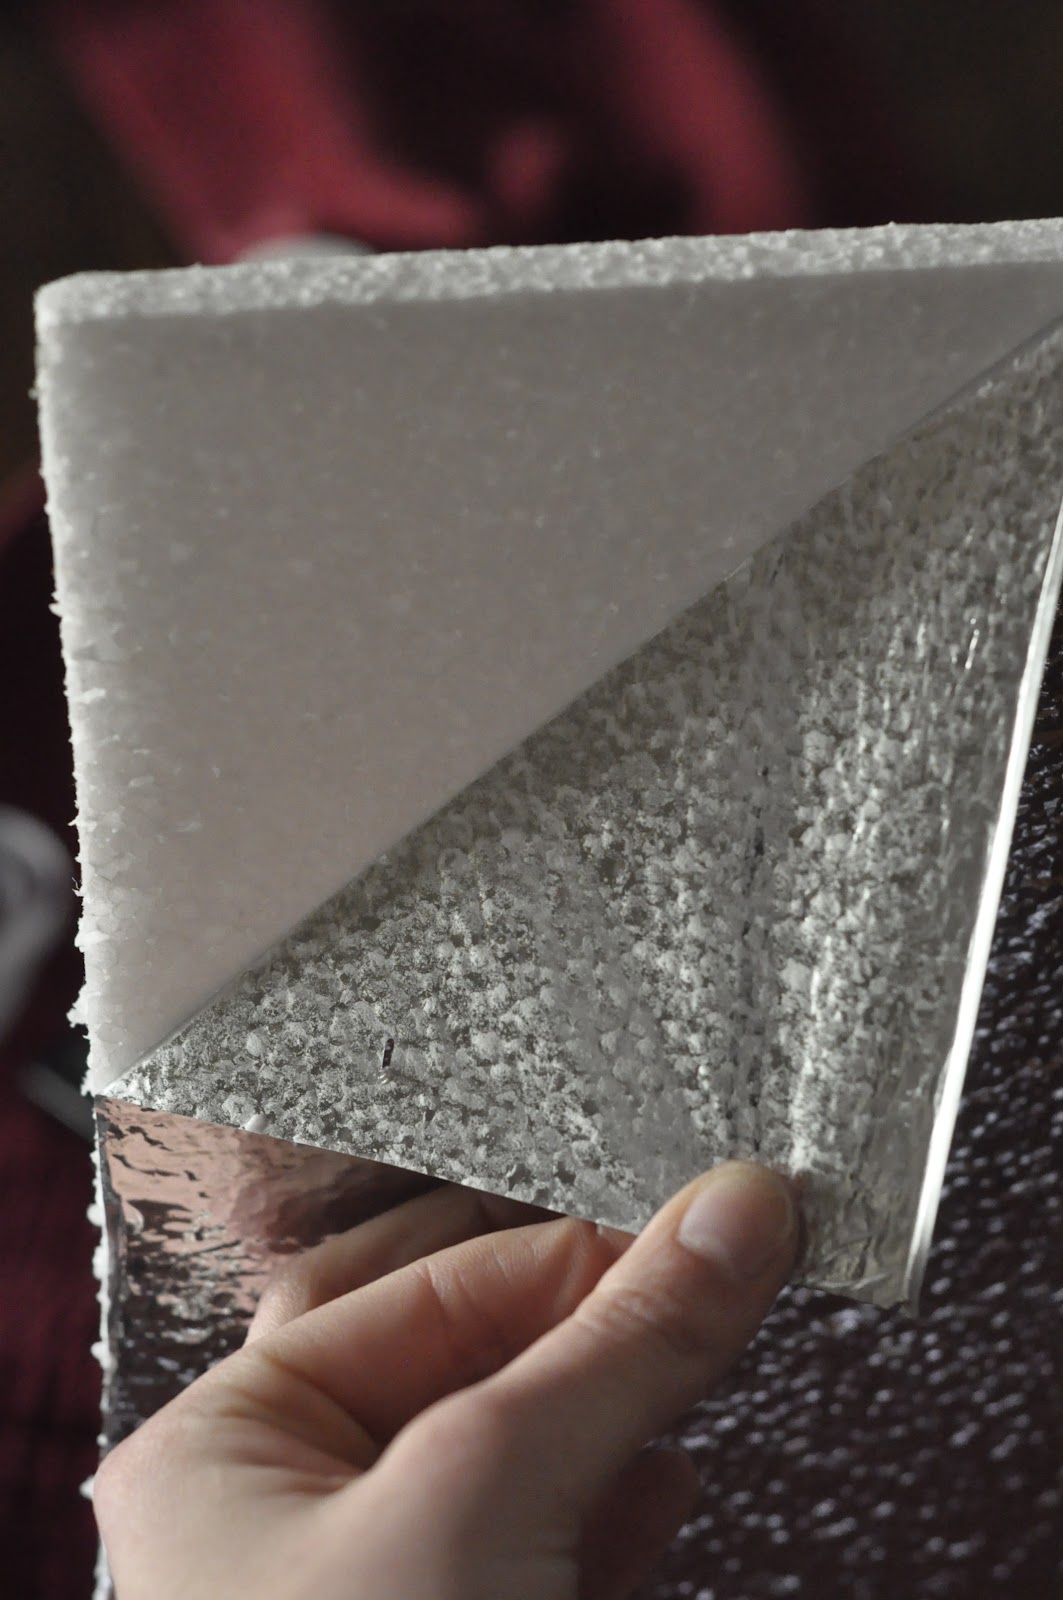
Basically what you do is take your photo to Office Max and have them print it in black and white. I got mine printed as 24x36. It only cost $4 so I got 2! One for my Living room and one for my sons room. Then you go to Home Depot and get a large piece of foam board. Mine only cost $7.50 and I was able to get 3 large pictures out of it. 


I cut it down to size using a box cutter and used spray adhesive to attach the photo. Mine had this silver lining on the back that was easily removed.


The edges were a bit rough, so I painted them black with craft paint. On my sons I added a ribbon border to cover the rough edge.


Once it was done I just used Velcro to hang it on the wall.


This is where normally you would be done but I wasn't satisfied with the "finished" look. To me it looked plain and like it was missing something...probably because my wall is big and empty.


So I made a big chunky frame to surround the picture and I love the finished project! It gives it such a custom look.


Stay tuned for a tutorial on how to make this frame. Its super easy I promise!!

Related Posts Plugin for WordPress, Blogger...