Photobucket Photobucket Photobucket Photobucket Photobucket Photobucket

May 31, 2011

Spring into June

If you live here in Utah, you will know that Spring has slowly made its appearance.
Now that its June, I finally feel like Spring is in the air. 
Over the past few weeks I have been watching my plants and trees bloom and grow, and in the process I found a little surprise.


I walked by my front door and saw a robin making a nest in my favorite tree. 
A few days later I grabbed my camera and went in for a closer look.


To my surprise I saw 4 beautiful robin eggs. Aren't they pretty?? 

For the next couple weeks I would check on them to see if they hatched and finally the other day they did!


They aren't as pretty. Actually they are pretty ugly! 

Today I just checked on them and they are starting to get cuter.
Its crazy what a difference a few days can make.


Its been hard to get pictures of these babies since the Momma bird is always near. 
This morning she was feeding her babies and it was The.Cutest.Thing.Ever!
This was as close as I could get to the scene...


I love Spring and all that it brings with it, but I do hope that the warm and sunny days are around the corner!

May 24, 2011

tie up curtain tutorial

As you all know I have been working on our playroom loft. I have to take things step by step to get a room to where I want it. First was the entertainment center, then a rug and now a curtain for the window. I made this tie up curtain for only $8, which included fabric and a curtain rod!

Here is how I did it:

I went to Hobby Lobby and got 1 1/4 yd fabric. It was discounted 30% off! I measured my window which is 34" wide and cut my fabric accordingly. I cut 4 pieces for the ties that were 5" wide and 26.5" long and 1 piece that was 10" wide and 34" long for the rod pocket. Then whatever fabric I had left was my main curtain panel. 


Next I folded all of the outer edges about 1/2" and ironed them. Then I folded all 4 tie pieces in half and ironed them.


Once all pieces were ironed I sewed a straight line across the edges to prevent fraying.


Now that all edges are sewn it is time to assemble.


To place the ties I just folded the panel piece in half to find my center. Then I placed each tie piece in the center of each half. I pinned one tie piece on front and on back like so:


Then place the panel piece inside the rod pocket piece and pin.


Sew a straight line across the pinned section and you are done!

Now for the curtain rod, I just got the cheapest one at Walmart for like $1! 
It works perfect for a simple curtain like this.


Once its hung, tie the front and back ties together to gather the panel.


Normally I line all of my curtain to prevent sunlight coming through, but the loft gets such good light that I didn't want to take away from it. Plus this fabric was a bit thicker so it bunched up well enough without a liner.


I hope that was simple enough and made sense. Really its a simple and cheap project that only took me about 1 hour total to make. And if I can do it so can you :)

linking up to:
Not Just a House Wife
Tip Junkie
Homemaker On A Dime
Cherished Bliss
Todays Creative Blog
House Of Hepworths 

May 19, 2011

New Domain


I just switched my domain to


I came across a great deal that I couldn't pass up and thought I would share it with all of you. Godaddy.com is selling domains for $1.29/yr. So for all of you out there that have been wanting to drop the "blogspot" but didn't want to fork over the $ (like me) now is your chance.

Just enter in the code INDY129 at checkout.

Its pretty simple to use and blogger will automatically forward 
all readers to the new site...not a bad deal if you ask me!! 


P.S.- Here is a link to help you all switch your domain...
Blogger Help

May 17, 2011

It's finished!

I FINALLY finished my crown molding!!!
It has been such a pain, and I complained A LOT, but now that it is done I am so happy with the outcome!

I spent DAYS preparing the molding for painting...then I spent 2 days painting. 
As I went around taping, I took a magic eraser and cleaned it. As you can see it was pretty dirty...


This made it so that I really only had to do one coat of paint. 
I chose to do 2 coats just because I had extra paint, but some areas I only did one...like behind the cabinets. 
You cant even tell a difference.


As I said before, our house has many weird angles, so it made sense for us to hire someone to help.

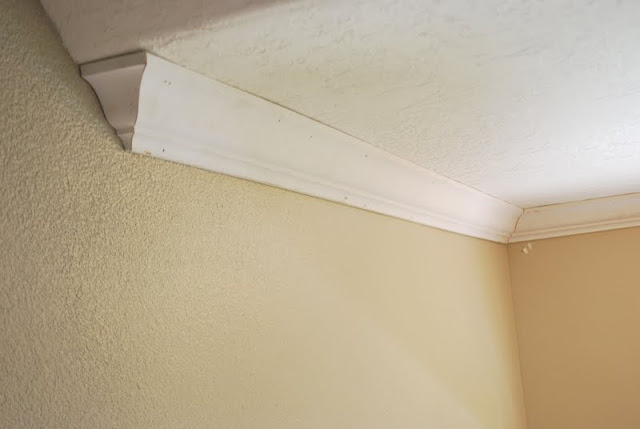
 This edge was kind of tricky, but I love how it turned out.


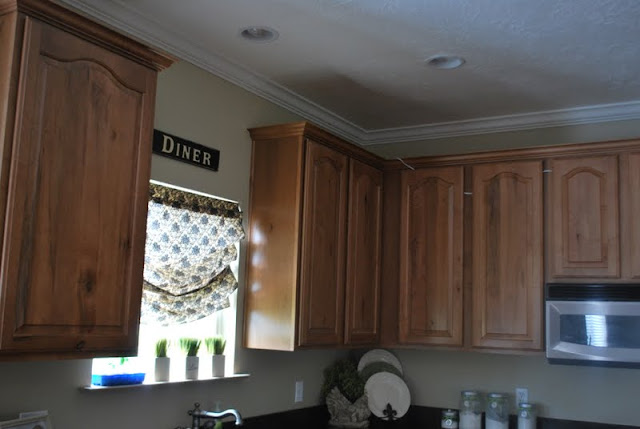
Here are some before and after shots...


Makes a nice difference, huh?! 
While we were at it we did the Master as well.


 This room is SLOWLY coming along. It is still far from where it needs to be, but crown molding makes everything look nicer.

May 10, 2011

Crown Molding

Happy late Mother's Day! I hope all of you Mothers out there had a wonderful weekend. My family spoiled me all weekend long :)

I know I have been a bit behind lately so today I will be sharing something BIG. 
For the past couple of weeks I have been working on our crown molding and it has taken all of my free time! I still haven't finished it yet but I want to share the process before the finished product.

Forever my Husband has been wanting to install crown molding in our home. The problem is that our main floor is close to 1500sf and is all connected. So the whole main floor would have to be done, that's close to 400 ft of molding! We also have tons of weird angles and corners that we decided it was out of our ability to do it ourselves. So we brought in our friend Morgan, who does finished carpentry for a living, to help us out. He showed up and within 15 minutes he had his saw set up and his first piece in place.


Eric and Morgan spent about 5 hours one day putting it all up...the caulking, sanding, taping and painting is all my job. Lucky me huh?!?


Morgan did most of the work and also taught us a few things.
First thing he taught us was all about angles. You need to know the angles of the corners you are working on, most corners are 90°. If your corner is 90° then it means your cuts have to be at a 45° angle. That is what the corners in the above picture are. Now the tricky part was our rounded corners.


To get 90° on this corner we needed each cut to be 22.5°, because 4 cuts at 22.5 equals 90. 


Here is how he did the corners: take some wood glue and glue the center piece to your edge piece.


Next he switched nail guns from a standard 18 gauge to a 22 gauge. This gun is the key to getting professional looking corners. Its way smaller and makes tiny hard to see holes.


He uses this gun to nail in the middle pieces of the corners. As you can see from the pics below, he never nails the middle piece into the wall itself. He just glues and nails them to the other pieces.


And there is the basics on putting up crown molding. Now comes the fun part, caulking! It has taken me 3 days of work to caulk all of the molding. The best tip I have for caulking is to use this finishing tool.

This tool will save you life...and your fingers! I used this for the top of the molding but not the bottom. I found that the easiest way to do the bottom was to apply the caulk with a caulking gun and then go over it with a wet rag to remove the excess.

For the nail holes we used this painters putty which was easy to work with and can be applied with a finger.


If you have a large space and you want to add crown molding it seriously would be worth the $ to hire someone. This has been a HUGE project but in the end it will be worth all of the hassle. Hopefully in the next couple of days I will have them painted and ready to post!!

May 2, 2011

A New Rug

Happy Monday everyone! 
I hope everyone had a wonderful weekend, I know I did. 
It was busy filled with yard work, house work and a lot of play time :)  

I have some exciting stuff to share coming up but for now I want to post more on my Loft. 
I got a lot of good advice from readers on what to do next and a few people mentioned that a rug would really make this room "pop".  So I started the search for the perfect rug and I finally found it.


I wanted something that was colorful and fun and this is just right. I got it at Target for like $30. 
I tried searching the classifieds but everything either had stains or was way over my price range.

Here is the room without the rug:


and with the rug:


It totally makes the room feel warmer to me and a little bit more like "home". 
While I was at Target I got these little tins from the dollar section. 


So cute and its perfect for the kids.
Now that I found the rug I want to find some coordinating fabric to make a window valance and cover this lampshade.


It kind of matches the room right now, but I want it to pop a bit more. 
We will see what I come up with.
Related Posts Plugin for WordPress, Blogger...